Discover the Importance of a Reliable Toilet Shut-Off Valve
When you think about your bathroom’s plumbing, what’s the first thing that comes to mind? Most likely, it’s the toilet itself, the sink, or maybe even the shower. But what about the unsung hero of your bathroom’s plumbing system, the toilet shut-off valve? This small but crucial device plays a significant role in maintaining your bathroom’s functionality and preventing potential disasters. In this blog post, we’ll dive into the world of toilet shut-off valves, exploring their importance, how to choose the right one, and when and how to replace them.
Understanding the Toilet Shut-Off Valve
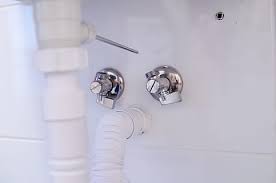
Let’s start with the basics. The toilet shut-off valve, often located on the wall behind or beneath the toilet, is responsible for controlling the flow of water to your toilet. It’s a simple device that, when fully open, allows water to flow into the toilet’s tank, enabling flushing. When closed, it stops the water supply, making it a critical component in preventing leaks and water wastage.
Why Is It Important?
- Emergency Shut-Off: In case of a plumbing emergency, like a toilet overflowing or a leaky supply line, the shut-off valve is your first line of defense. Turning it off can prevent significant water damage to your home.
- Maintenance and Repairs: When you need to repair or replace your toilet, having a functioning shut-off valve makes the process much more manageable. It allows you to isolate the toilet without affecting water supply to other fixtures.
- Water Conservation: A properly functioning shut-off valve ensures that your toilet doesn’t run continuously, saving water and reducing your utility bills.
Choosing the Right Shut-Off Valve
When selecting a toilet shut-off valve, consider the following:
- Material: Look for valves made of durable materials like brass or stainless steel to ensure longevity.
- Type: There are two main types of shut-off valves: compression and quarter-turn. Quarter-turn valves are easier to operate and are less prone to leaks.
- Size: Ensure the valve’s size matches the size of your water supply line.
- Quality: Invest in a high-quality valve from a reputable manufacturer to minimize the risk of future problems.
Maintaining and Replacing Your Valve
Even the best shut-off valves may eventually require maintenance or replacement. Signs that it’s time to take action include:
- Difficulty turning the valve.
- Visible signs of corrosion or rust.
- Water leaks around the valve.
- A toilet that doesn’t stop running even when not in use.
When replacing your shut-off valve, follow these steps:
- Turn off the water supply: Locate the main water shut-off valve for your home and turn it off.
- Drain the system: Flush the toilet and open faucets to drain any remaining water from the system.
- Remove the old valve: Use a wrench to disconnect the old valve from the water supply line.
- Install the new valve: Wrap plumber’s tape around the threads of the water supply line and attach the new valve. Tighten it securely.
- Turn on the water: Gradually turn on the main water supply and check for leaks.
- Test the valve: Open and close the new valve a few times to ensure it operates smoothly.