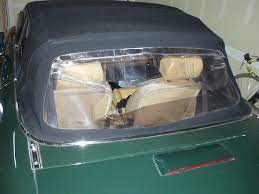
High-Quality Rear Window Replacement Services
When it comes to automotive repairs, few things are as important as maintaining clear visibility while driving. A damaged rear window not only compromises your ability to see what’s happening behind you but also poses safety risks. Rear window replacement is a critical task that requires careful attention and professional expertise. In this blog, we will take you through the process of rear window replacement, from identifying the issue to finding a reliable repair service and ensuring a seamless replacement.
- Diagnosing the Problem: The first step in addressing a damaged rear window is to identify the extent of the issue. Cracks, chips, and shattered glass are common problems that can occur due to accidents, extreme weather, or even simple debris impact. Assess the damage carefully – is it a minor crack that can be repaired, or is the entire window shattered? This initial assessment will guide your next steps.
- Seeking Professional Help: While minor chips and cracks can sometimes be repaired, a shattered or extensively damaged rear window typically requires a complete replacement. Attempting a DIY repair or replacement can lead to more harm than good, both in terms of safety and overall cost. It’s best to seek the expertise of a professional auto glass repair and replacement service. Look for established and reputable service providers in your area.
- Choosing the Right Glass: When getting a rear window replacement, it’s important to ensure that the replacement glass matches the original specifications of your vehicle. Different vehicles have varying sizes, shapes, and features for their rear windows. A professional auto glass technician will be able to accurately determine the appropriate glass for your specific make and model.
- Removal of Damaged Glass: Once you’ve chosen a reputable repair service and obtained the necessary replacement glass, the damaged rear window will be carefully removed. This process requires precision and experience to avoid causing further damage to the vehicle’s frame or surrounding components.
- Installation of the New Rear Window: With the old glass removed, the new rear window will be expertly installed. The technician will use industry-standard techniques and adhesives to ensure a secure and weatherproof fit. Proper installation is crucial to maintain the structural integrity of the vehicle and prevent leaks.
- Quality Check and Safety Precautions: After the replacement, a thorough quality check will be conducted to ensure that the new rear window is securely in place and functions correctly. Additionally, safety precautions, such as allowing sufficient time for adhesives to cure, may be advised before you can drive your vehicle again.
- Post-Replacement Care: Maintaining your newly replaced rear window is essential for its longevity and performance. Avoid slamming doors, rough handling, or extreme temperature changes in the initial days following the replacement. Regular cleaning and inspection can also help identify any issues early on.
Conclusion: A damaged rear window is not just a cosmetic issue; it’s a safety concern that requires prompt and professional attention. By following the steps outlined in this guide, you can ensure a successful rear window replacement that restores clear visibility.
